
Python is a scripting language that can be edited with any text editor like Sublime Text, NotePad etc. But it helps to use a dedicated IDE(Integrated development environment) for Python. Let’s do that and make our life a bit easier.
We will be using PyCharm as our IDE. It is available free and fits nicely into our workflow.
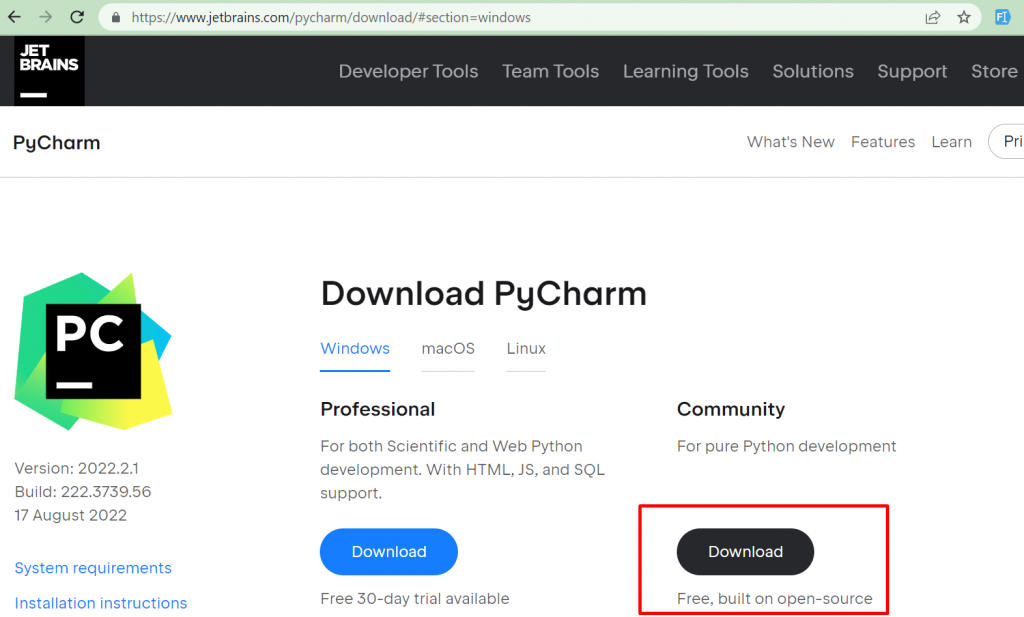
- Go to https://www.jetbrains.com/pycharm/download
- Go to Windows Tab
- Download Community version of PyCharm and double click it and follow the on screen instructions.
Then let’s open Pycharm and start a python project
You can either create a python project from the welcome screen or go to File Menu and click on Create New Project

Once you click create button, you should see the project structure like below:

You can try to run the main.py to see if python has been properly configured.
To run a file we can either use the green play button on the top , but we have to make sure that the file we are going to run is the one selected in the dropdown alongside the play button.

We can also run the python file by right-clicking anywhere on the file and clicking run “filename”

Execution should be something like this where the output is displayed in the console on the bottom.
Now, let’s prepare for selenium program.
We first need to install selenium package in our project
For that, Go to File > Settings

In the Settings Screen, we need to navigate to the project that is created and open up Python Interpreter


Now, we have to add the packages, so lets search for selenium package and install it , click on the + button

A window for available packages opens up. Search for Selenium and click Install Package button.


Packade ‘selenium’ installed successfully will be displayed if selenium package is installed correctly.
Now we close this window and go back to the project structure, under the referenced libraries > site -packages, we should be able to view Selenium as a referenced library.

Now, we are ready to write our first webdriver selenium code
Create a new python file in your project by right-clicking in the python project and choosing Python file.

Provide a name, I have named mine as FirstSelenium, now you should be able to see the FirstSelenium.py file in the project structure.
We will have to import selenium webdriver in the current file.
So we write the following code in FirstSelenium.py

First line will import webdriver function from Selenium library which we can then use in our second line to create a driver method of type webdriver that can control Chrome browser and third line is giving command to the browser to open up the Google.com url.
You should be able to see chromebrowser opening and opening google.com page once you run the file.

We can also get the same result by the following code where we provide the full path of the executable file of ChromeDriver.exe while instantiating the driver object.

Another method is using webdriver-manager package to deal with browserdrivers. For that , we need to install webdriver-manager package by going to File>Settings>Project >Python Interpreter and clicking the + button to open up Available packages and then search for webdriver-manager package. Install it and close the window.

Then, we can use the following code to do open the browser and go to google.com

Now, that webdriver-manager is properly installed, we go back to the python file we are writing and add this code.

The run results should be same as before, opening up a new browser and going to google.com. This is how we can configure selenium webdriver in python and start automating web.